The Macintosh operating system has always made it easy to capture a screen shot. A screen shot is an image of your computer desktop or an active window. Here's a summary of all the keyboard shortcuts you can use to capture your screen in Mac OS X.
The saying used to be, “There’s an app for that.” Now the new saying is, “There’s a shortcut for that.” Copy and paste actions with this. On a Mac keyboard, the Command key is denoted with the symbol. For information about changing the key assignment of a keyboard shortcut, see Mac Help for your version of the Macintosh operating system (OS) or see your utility application. Also see Keyboard Shortcuts in OneNote for Mac later in this topic.
A. Entire screen:
- To capture the entire screen, press Command-Shift-3. The screen shot will be automatically saved as a PNG file on your desktop with the filename starting with “Picture” followed by a number, example Picture 1, Picture 2, and so on.
- To copy the entire screen, press Command-Control-Shift-3. The screen shot will be placed on your clipboard for you to paste into another program like PowerPoint, Word, Photoshop, etc.
B. Portion of the screen:
- To capture a portion of the screen, press Command-Shift-4. A cross-hair cursor will appear and you can click and drag to select the area you wish to capture. When you release the mouse button, the screen shot will be automatically saved as a PNG file on your desktop following the same naming convention as explained on the first tip above.
- To copy a portion of the screen to the clipboard, press Command-Control-Shift-4. A cross-hair cursor will appear and you can click and drag to select the area you wish to capture. When you release the mouse button, you can paste the screen shot to another application.
C. Specific application window:
Mac How To Copy Paste
- To capture a specific application window, press and hold Command-Shift-4 then tap on the Spacebar. The cursor will change to a camera, and you can move it around the screen. As you move the cursor over an application window, the window will be highlighted. The entire window does not need to be visible for you to capture it. When you have the cursor over a window you want to capture, just click the mouse button and the screen shot will be saved as a PNG file on your desktop.
- To copy a specific application window, press and hold Command-Control-Shift-4 then tap on the Spacebar. The cursor will change to a camera, which you can move around the screen. As you move the cursor over an application window, the window will be highlighted. The entire window does not need to be visible for you to capture it. When you have the cursor over a window you want to capture, just click the mouse button and you can paste the screen shot into another application.

___________________________________________________________
Computing Tips and Techniques are brought to you by the Information Technology Group for the purpose of sharing a wide variety of technology tips with its clients. The collection of these tips are protected by intellectual property rights, such as copyright. All intellectual property rights belong to the manufacturer of the software product in question.
Paste On Mac Keyboard
WayNet's How To Center

Your computer experience will much easier if you can remember the keyboard shortcuts for often used commands to perform 'cut', 'copy' and/or 'paste' of text or images. These commands are often available to you via these keyboard shortcuts, even if they are not an option in the program or window in which you are working.
These keyboard shortcuts require you to hold down two keys at one time.
- First, select the text or image you wish to cut or copy(it will look similar to this: selected text.)
- or, using your mouse, place your cursor in the location you wish to paste information. (It will look similar to this: I_____________.)
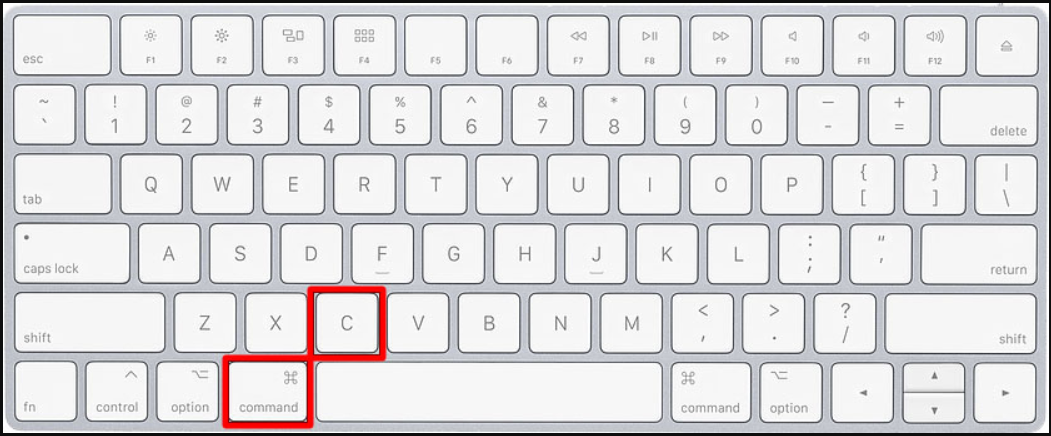
- Press the 'Control' key. This may be abbreviated as 'Ctrl' on your keyboard. (Command key on a Mac)
- While continuing to hold down the Control key, press either X, C, or V at the same time to perform the following:
CUT
Keyboard Command: Control (Ctrl) + X
Remember 'X' as
The Cut command is used to remove text or images from the screen you are currently working on. 'CUT' moves the information to your virtual clipboard, where it is stored until it is overwritten by the next 'cut' or 'copy' command.
COPY
Keyboard Command: Control (Ctrl) + C
Remember 'C' as
The COPY command is used for just that - it copies the text or image you have selected and stores is on your virtual clipboard, until it is overwritten by the next 'cut' or 'copy' command.
PASTE

Keyboard Command: Control (Ctrl) + V
Remember 'V' as
The PASTE command is used to place the information that you have stored on your virtual clipboard in the location that you have placed your mouse cursor.
Test Yourself!
Try copying the information from the first box and paste it into the second box.

Mac Copy Paste Keys
Submitted by:
Jane Holman
WayNet.org
50 North Fifth Street
Richmond, IN 47374
Email: jane@waynet.org
Phone: 765.939.0857
WayNet Member: WayNet.org
Member Website: http://www.waynet.org
This article has a Creative Commons License.
Disclaimer:
Mac Copy And Paste File
The WayNet How To Center is a collaborative project of members of WayNet.org volunteering to develop a how-to manual. The WayNet How To Center has not been reviewed by trained professionals for it's accuracy, reliability, legality or safety of its instructions. We make no guarantee or warranty that the information in the WayNet How To Center is accurate, legal, reliable, or safe to practice. Always consult a trained professional before following any of the advice you find in the WayNet How To Center. Nothing in the WayNet How To Center should be construed as an attempt to offer legal, medical or other professional advice. Neither the WayNet How To Center, nor the authors, editors, or members can be responsible for your use of information contained in or linked from this site. You must independently verify all information you find on the WayNet How To Center. Use this site at your own risk.